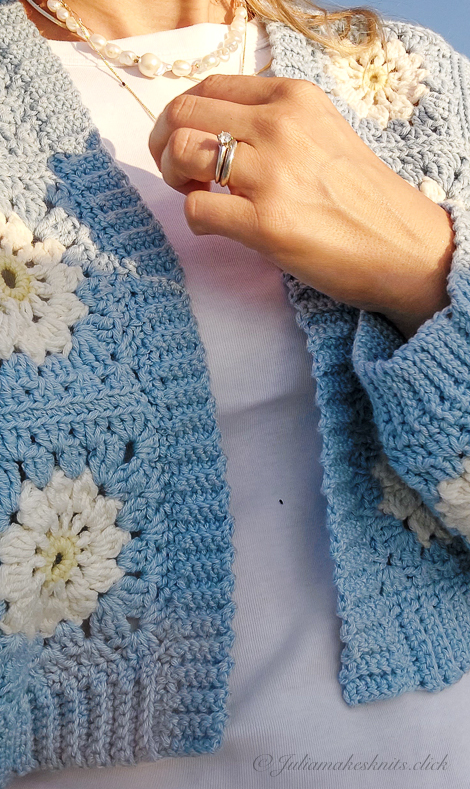
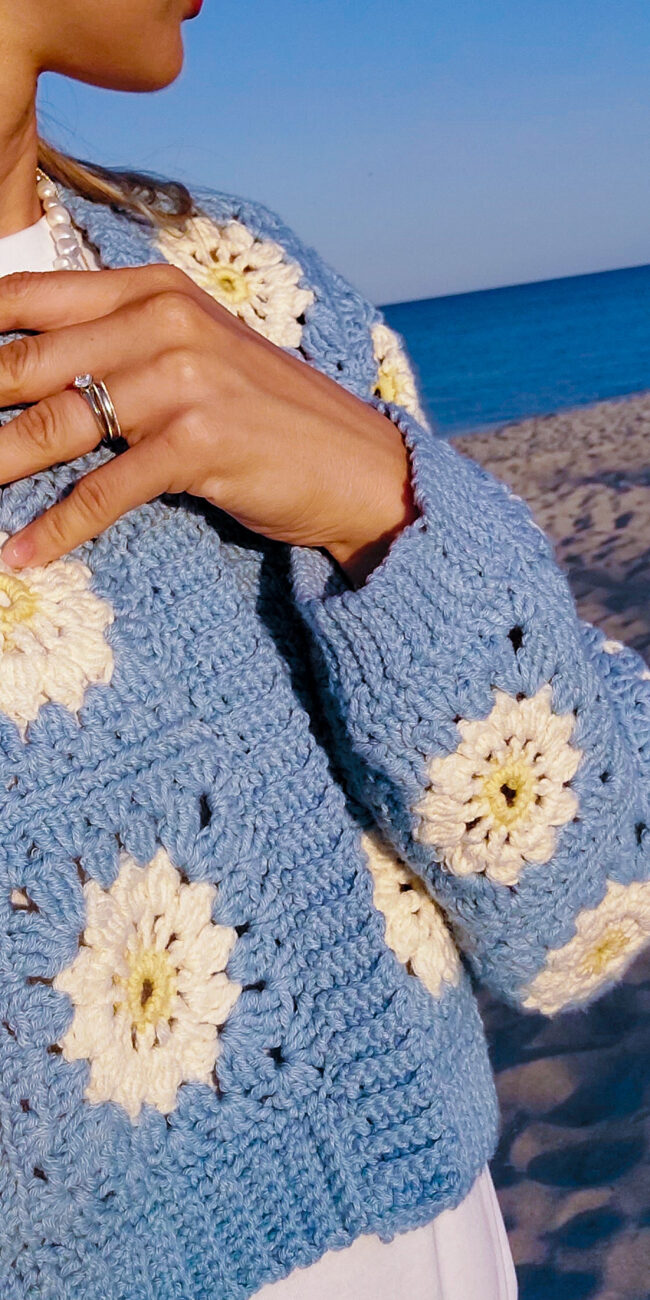
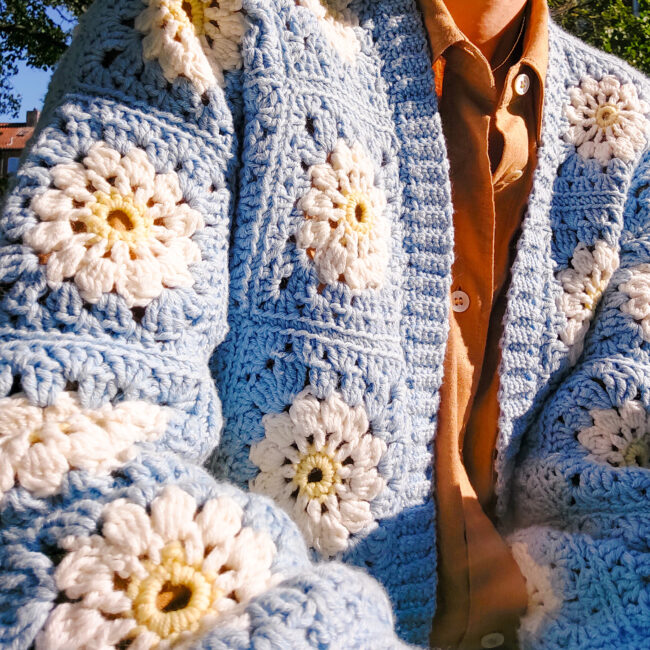
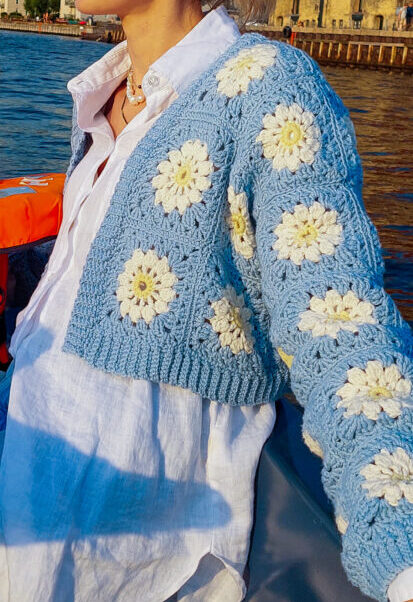
My Crochet Comeback: Easy Granny Square Cardigan For Crochet Beginners❀
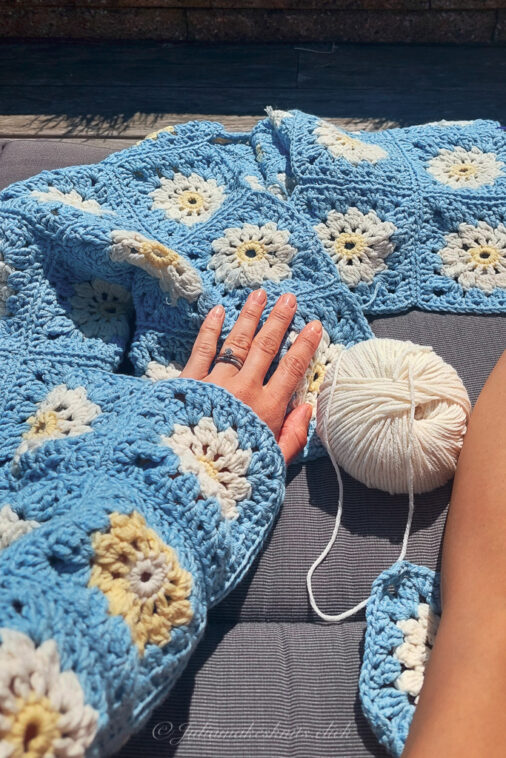
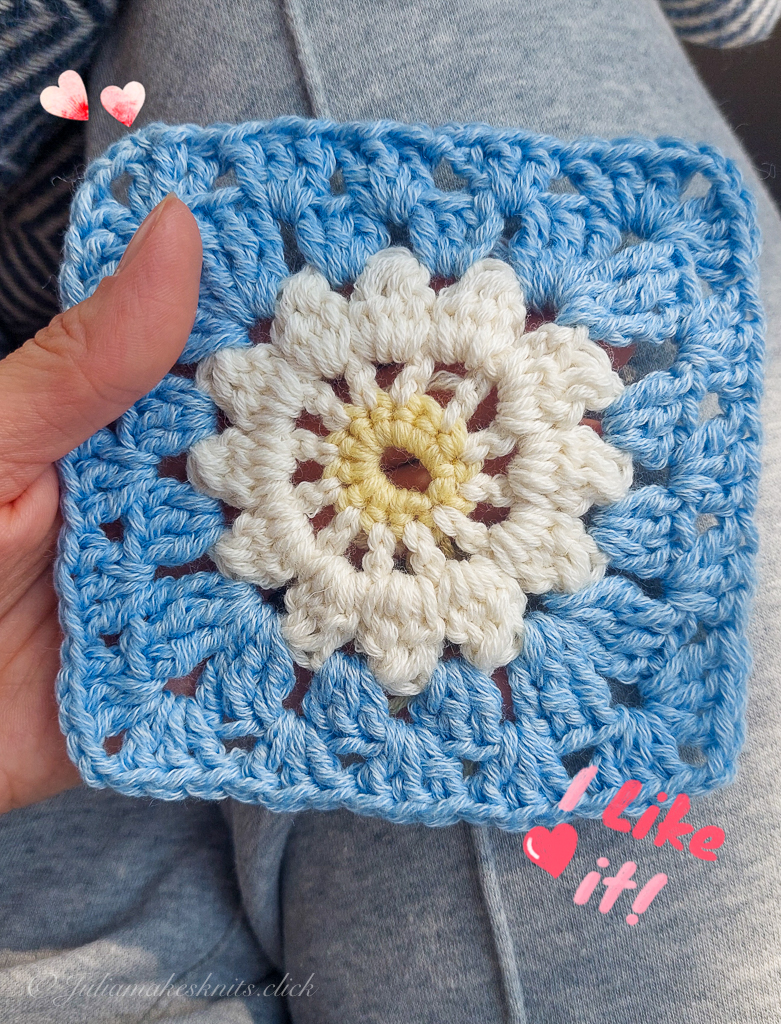
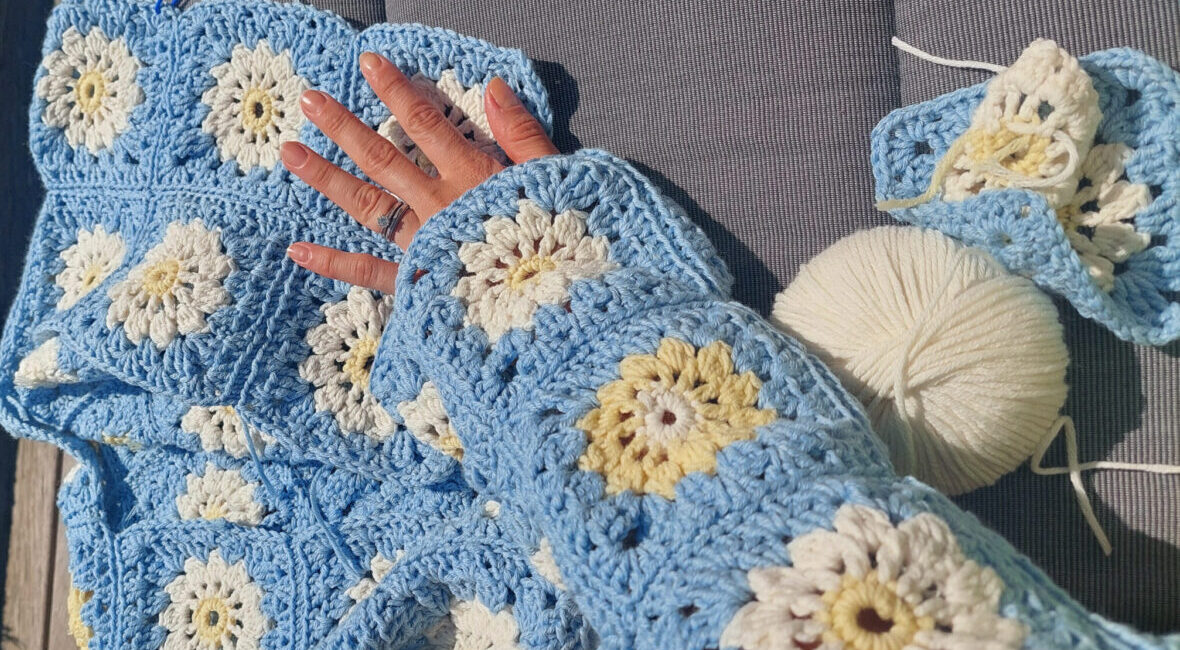
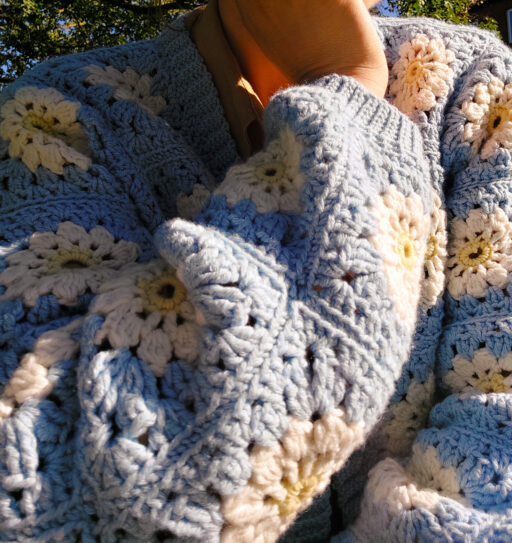
Can you believe I haven’t crocheted in 15 years? Crazy, right? Anyways, I decided on a cardigan. I thought it would be a fun challenge and a great addition to my wardrobe. I went with a daisy granny square pattern because it’s so iconic and cute.
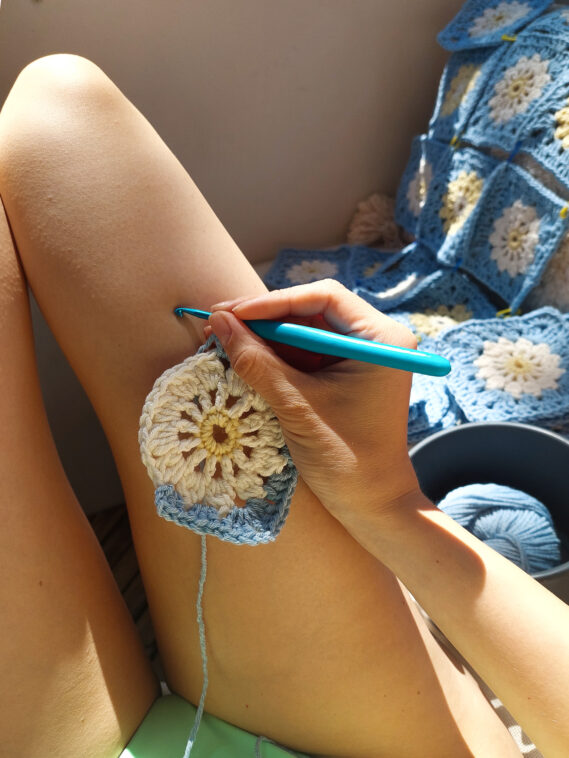
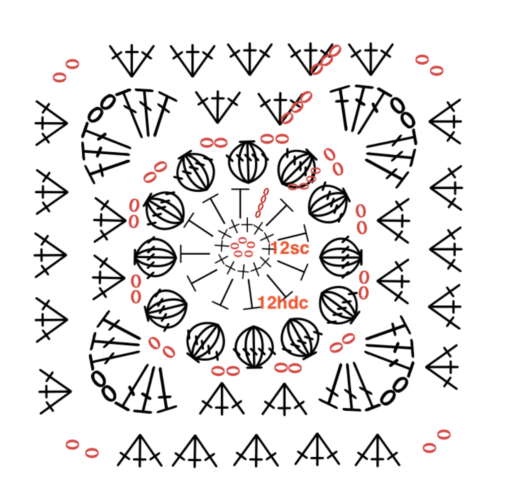
Don’t worry if cardigan seems like a big project for a crochet beginner. Making granny squares is super easy and it’s a great way to practice your crochet skills.
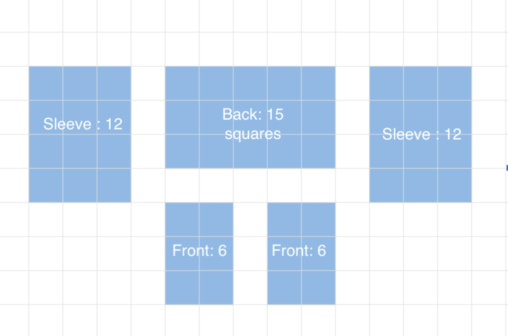
Since most of my crochet happens while I’m commuting from A to B or during weekends, I’m pretty happy how quickly it was made, considering I had to make an extra six squares to extend my sleeves.
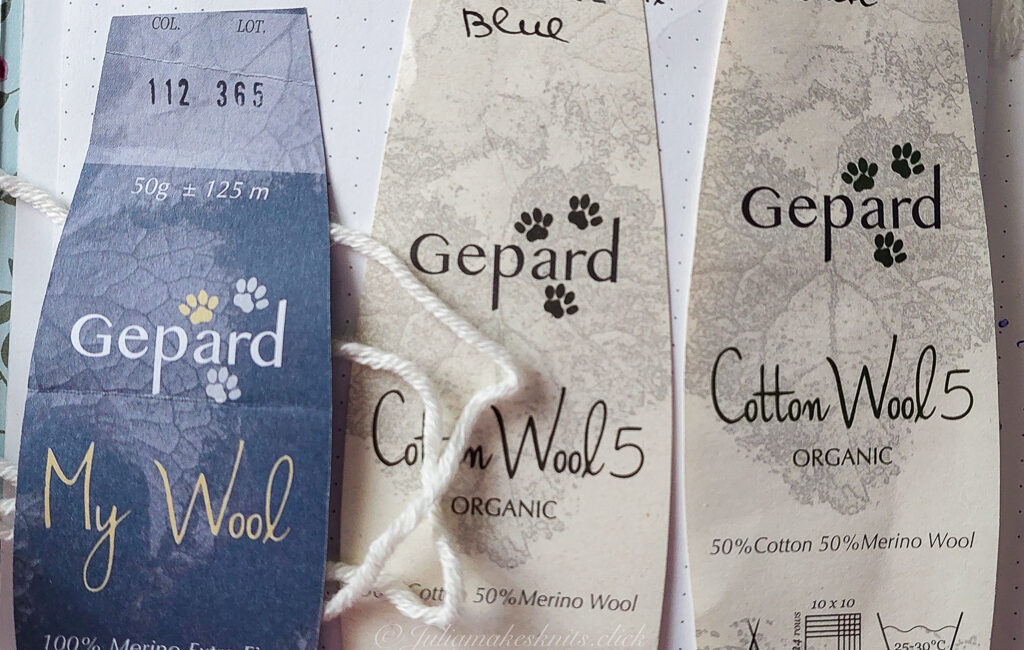
Reminder: Be mindful of my yarn calculations when crocheting. Instead of buying 100m skeins, I should opt for a brand that offers the same quality and colour in 140m+ skeins that are cheaper and easier to work with.
For blocking, I found mist blocking to be the best. I gently misted ( with spray bottle) each square and laid them flat to dry. If necessary, I carefully pinned them to the desired dimensions before misting. This type of blocking is my preferred method as it provides the right amount of moisture without exposing the yarn to excessive heat like steaming or accidentally overstretching with wet blocking.
- Start date: 26th May 2023 / End Date: 18th June 2023
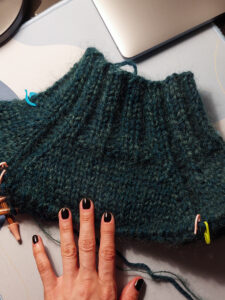
- Hook: 4mm and 3.5mm for ribbings
- Yarn: Gepard Blue. Col 112 / Lot 912 and Gepard Yellow. Col 112 / Lot 365 and Gepard White. col 101 / Lot 521List Item
- Total skeins: 10 blue (100m), 1 yellow (125m), 2 white (150m)