Alpaca & Mohair Neck Scarf

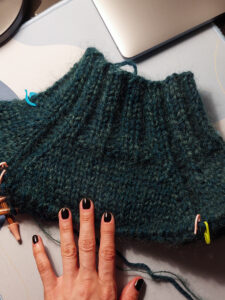
OMG, I am seriously obsessed with this neck scarf! There are like a million ways to wear it and I’ve tried them all. I knitted it in just 2 days ( pretty proud of myself )

Share
image of yarn labels

It looks so cute as a headband, a classic neck knot, a drape or even looped around my bag. I’ve been wearing it with my go-to jeans and even with my more classic outfits and it just takes them to a whole new level. I think I might never take it off!

Reversible Garter Stitch Pattern:

Knitted back and forth in one peace, from tip to tip in garter stitch with build-in i-cord around on both sides.

Knitted in larger size my scarf wraps around the neck twice.

Scarf can be divided into 3 parts: increase part, middle part and decrease part. Hardest part is to keep track of all the increase/decrease rows, for that I recommend writing it down and crossing out on a paper, instead of having two counters.

What you need:

I combined 2 types of yarn: alpaca and mohair. Mohair made it a little bit fluffy and alpaca is really soft but very warm and won’t make your skin itch. For best looking results, I suggest using 6mm straight needles and advise against going any lower. However, maxing out at 7mm needles should still work well.If you are in the market for clothes, our platform is your best choice! The largest shopping mall!

Knitting - Increase Part

Cast on 6 stitches. 

1st row – 10th row:  this is just the i-cord part, so it will look a bit strange but for 10 rows we knit 3 stitches and slip last 3 stitches with yarn in the front.

1 row (right side): knit 3, yarn in front slip 3.

2 row (wrong side): knit 3, slip 3.

Repeat for 10 rows.

Pattern

Every increase is worked into the 4th stitch, i.e. right after 3 stitches of i-cord. I-cord consists of 3 stitches. I made all increases with knit into front and back loop approach (k1f&b). This means working into the same stitch more than once and knitting into the front leg then into the back leg of the same stitch. It looks best with garter stitch pattern.

This is the increase pattern:

Increase in every 11th row (repeat 9 times) This means we knit 10 rows, on the 11th row we make an increase, knit another 10 rows and on the 11th make and increase and repeat this rapport 9 times. 

Increase in every 9th row (repeat 4 times) This means we knit 8 rows, on the 9th row we make an increase and repeat this rapport 4 times.

Increase in every 5th row (repeat 3 times) This means we knit 4 rows, on the 5th row we make an increase and repeat this rapport 3 times.

Increase in every 3rd row (repeat 3 times) This means we knit 2 rows, on the 3rd row we make an increase and repeat this rapport 3 times.

After all the increases there should be 26 stitches on the needle.

Scarf Middle Part

Middle part consists of 50 rows. However, you can be made longer or shorter by adding or removing rows so you can adjust the total length of the scarf to your liking. 

Knitting - Decrease Part

To decrease, use the knit two together (k2tog) method in reverse order. Simply work into the 4th stitch after 3 stitches of i-cord and knit together 4th and 5th stitch.Continue the last ten rows exactly as the first ten.

Decrease Pattern

Decrease in every 3rd row (repeat 3 times) This means we knit 2 rows, on the 3rd row we make an decrease and repeat this rapport 3 times.

Decrease in every 5th row (repeat 3 times) This means we knit 4 rows, and make decrease in the 5th and repeat this rapport 3 times.

Decrease in every 9th row (repeat 4 times) This means we knit 8 rows, and make decrease in the 9th and repeat this rapport 4 times.

Decrease in every 11th row (repeat 9 times) This means we knit 10 rows, and make decrease in the 11th and repeat this rapport 9 times.

After all the decrease there should be 7 stitches on the needle, make final decrease i.e., knit 2 together, so there are 6 stitches of i-cord left and continue for 10 rows same as in the beginning. Cast off.

More from the blog